Saturday, 21 March 2015

Hexagon Blanket

© Hooker Chick
It's a long time since I made a blanket and I didn't want to do squares or rows, so after brief fiasco with pentagons (see the trouble with five) I decided that hexagons were the way to go.  And don't they look fabulous!

All my projects start out with an idea and some yarn, and then I freestyle it until I arrive at something workable.  I've tried my best to make the instructions as clear as possible.  It was surprisingly complex when I started to type it up! 

You will need :

690 yds/630 m aran/worsted weight yarn in colour 1
610 yds/560 m aran/worsted weight yarn in colour 2
1200 yds/1100 m aran/worsted weight yarn in self-striping colour 3
I used Drops Nepal 0618 & 0612, and Lion Brand Amazing 'strawberry fields'.
4.5mm hook, darning needle, scissors.

Abbreviations:
ch : chain stitch
tr : UK treble stitch

From flat side to flat side, hexagons should measure 4" across.  Length of finished blanket 4 ft, width 3.5 ft measured point to point.

You will need to make 100 hexagons + 8 half hexagons.
Row 1 in colour 1, rows 2 & 4 in colour 3, row 3 in colour 2.

Here's how to make a hexagon ...

© Hooker Chick

... and make half hexagons as follows ...

ch 4, slip stitch into 1st ch to join ring.
row 1 : pushing hook through centre of ring, ch 3, tr 5.
row 2 : joining yarn at top of row 1 chain, ch 3, then tr 2 into space, cont tr 2 into each space, tr into top of last row 1 treble.
row 3 : joining yarn in space between row 2 chain and 1st treble, ch 3, tr 2, tr 3, ch1, tr 3, tr 3, ch 1, tr 3, tr 3.
row 4 : joining yarn at top of row 3 chain, ch 4, tr 3, ch 1, tr 2, ch 2, tr 2, ch 1 tr 3, ch 1, tr 2, ch 2, tr 2, ch 1, tr 3, ch 1, tr into top of last row 3 treble.

Weave in ends using darning needle.  You may wish to do this after making each hexagon!

Join hexagons to make up 9 rows ~ 5 rows of 12, and 4 rows of 11 + half hexagon at each end.  Line up flat edges, right sides facing out, join yarn at one end then hook through top of stitches of each hexagon, yarn over, pull through (2 loops on hook), yarn over, pull through both stitches on hook.  This gives a raised join, which adds a nice feature to the blanket.

© Hooker Chick

Join rows together using same method, working one way down the length and then up the other way, so that the way that the raised join lays alternates between rows ...

© Hooker Chick

To make the border, join yarn in colour 1 at end of long side, ch 3, then trebling into chain spaces tr 2, ch 1, tr 3, ch 1, tr 2, ch 2, tr 2, ch 1, tr 3, ch 1, tr 2, ch 1, tr 1, * tr 1, ch 1, tr 2, ch 1, tr 3, ch 1, tr 2, ch 2, tr 2, ch 1, tr 3, ch 1, tr 2, ch 1, tr 1.  Repeat from * to last tr 2 from end, tr 1 (so you miss out the chain between the last tr 2 and tr 1).

© Hooker Chick

Continue in a similar fashion for 6 rows, except miss out the chain space that is now in line with the raised join.  Yarn colours as follows :

Row 2 in colour 2
Row 3 in colour 3
Row 4 in colour 1
Row 5 in colour 3
Row 6 in colour 2

The final row continues all the way around the blanket.  Join colour 1 at the start of the first border row (i.e. at the first chain stitch you made) then ch 3 and tr 2 into the space between the ch 3 & tr 2 of the first border row.  Continue tr 3 into end of each border row, then ch 2 to make a corner, tr 3, ch 1, then continue as before along the long side.  The photo below shows how the stitch pattern should look at the corners ...

© Hooker Chick

 ... and the next two photos show the stitch pattern for the short sides, at each whole and half hexagon ...

© Hooker  Chick
© Hooker Chick

And that's it!  A cosy blanket to snuggle under on chilly winter evenings.

© Hooker Chick

© Hooker Chick
Happy hooking!

Wednesday, 4 March 2015

Infinity Scarf

© Hooker Chick
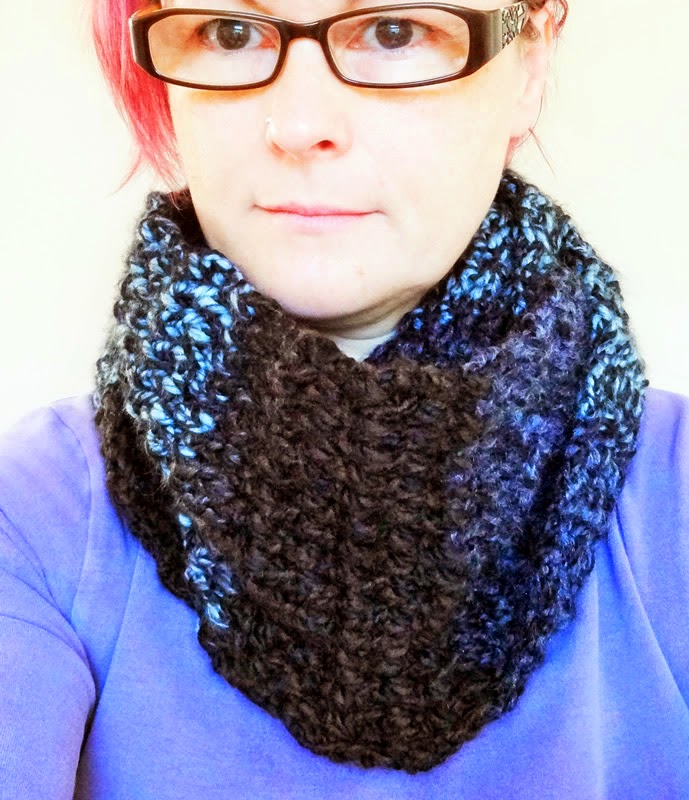
Infinity scarves are brilliant.  All the warmth of a normal scarf, but no ends to get blown about and in the way!  This one is so simple to make and a great first project for the novice hooker.  You will need around 350 yds of medium weight (aran or worsted) yarn, a 4.5 mm hook, and a darning needle.

Before I give you the pattern, a bit about yarn weight.  Yarn weights ~ lace, DK, worsted, aran, etc ~ refer to the number of individual strands that make up the 'ply' of the yarn.  Aran and worsted are both 10 ply, medium weight yarns, but whereas worsted has 9 wpi (wraps per inch), aran has 8 wpi.  This makes the diameter of aran yarn slightly wider than worsted. 

For this scarf pattern, I have used Lion Brand, self-striping 'Amazing' yarn, which is a US wool/acrylic mix yarn branded as medium weight.  I also made up a test strip using another US branded yarn ~ Drop's 'Nepal', an aran weight, wool/alpaca mix.  Although both are medium weight yarns and with many worsted and aran yarns there's very little, visible difference in thickness (many consider aran to be the UK term and worsted the US term for the same weight), there is a clear difference in the thickness of Amazing and Nepal.  A 50 g ball of Amazing is 147 yds/135 m, whereas a 50 g  ball of Nepal is 83 yds/75 m.  So a ball of Amazing is nearly twice the length of a ball of Nepal.  I would say that Nepal is definitely aran weight, but Amazing is much more like DK (DK = double knitting) and a light, not medium/worsted weight yarn.  However, it is quite fluffy, and suited the 4.5 mm hook okay.  Here's how the two yarns compare ...

© Hooker Chick

... and when crocheted on a 4.5 mm hook (both 26 sts wide) ...


© Hooker Chick


Okay then ... on to the pattern.

Abbreviations as follows:

ch ~ chain stitch
tr ~ treble (UK)
st ~ stitch
sts ~ stitches

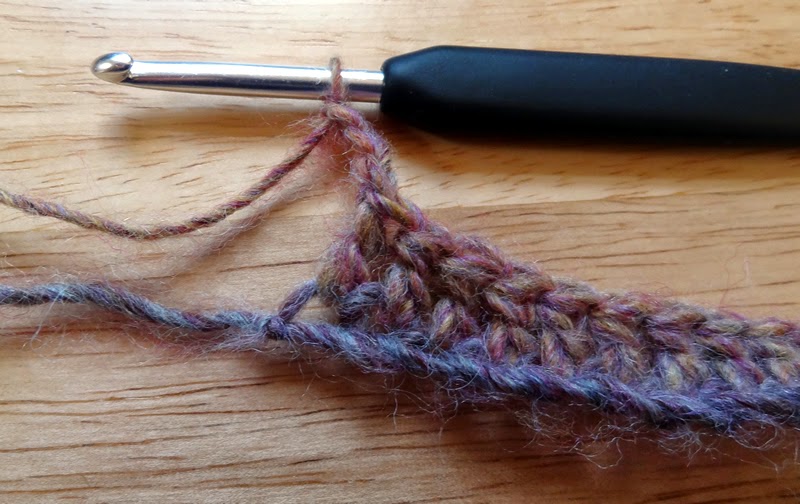
Make a slip knot and ch 25, keeping your tension loose.  As a guide, your chain should measure about 8 inches.

© Hooker Chick


Row 1 ~ ch 3 (normal tension), then tr into the top of st 25. 

© Hooker Chick

© Hooker Chick

Cont. tr into top of each st to end of chain ~ 26 sts in all including your first ch 3.

Row 2 ~ ch 3, tr into first space.

© Hooker Chick

© Hooker Chick

Cont. tr into each space to end of row.  You should still have 26 sts.

© Hooker Chick


Repeat row 2 a further 106 times (108 rows in all) or until piece is 48 inches long.  Seam short sides together using darning needle and weave in ends.  That's all there is to it!  Your infinity scarf is finished and ready to wear.


© Hooker Chick

© Hooker Chick


The 8 " x 48 " dimensions of the scarf can be transferred to other yarn weights and hook sizes.  Here's another I made in some cheap, super chunky acrylic yarn I bought in Aldi (6.5 mm hook, 15 sts to a row, 78 rows) ~

© Hooker Chick
Happy hooking!

Saturday, 28 February 2015

Really Useful Bag

I've been playing around with various scarf designs over the past week, working with different yarns, hook sizes and tension.  This was my first attempt, and whilst the design itself works fine, the yarn is very scratchy.  Not very comfy to wear!

So I decided to re-cycle it, and came up with this bag design instead.

© Hooker Chick

If you're a novice hooker, this is a good project for learning basic decreasing and increasing ~ essential for making jumpers, cardigans, and other shaped garments.  You will need around 700 yds of aran weight yarn (I used Plymouth Yarn Boko, which is a 95% wool 5% silk mix, but I think the bag would work well in a wool/cotton mix too), a 4.5mm hook, a darning needle, and some contrasting yarn to mark stitches.

Abbreviations as follows:

st - stitch
sts - stitches
ch - chain
dc - double crochet (UK)
tr - treble (UK)

To begin, make a slip-knot and ch 49, keeping your tension very loose ... 

© Hooker Chick

Next, (in normal tension) ch 3, tr into top of st 49 ...

© Hooker Chick

Continue to tr into top of each st to end of foundation chain (50 sts in all including the beginning 3 ch).

Second row, ch 3, tr into first space and continue to end of row (you should still have 50 sts including the beginning 3 ch).  Repeat for further 76 rows.

© Hooker Chick

Using darning needle, neatly seam short sides together.

Next, join bottom edge like this (please excuse my rubbish videoing technique, I'll get better at it, promise) ~


Count 16 sts either side of seam at top edge and mark (32 stitches in all).  Count 8 sts from markers and mark.  This should give you 32 sts, 7 sts, 32 sts, 7 sts ...

© Hooker Chick

Making the handle

Join yarn at one end of a 32, ch 2, tr 30, dc 1 (32 sts in all).  Next row, ch 2, tr into 2nd space, tr 28, dc 1 (31 sts in all).
 
Using this stitch pattern  - ch 2, tr into 2nd space, tr until last space, dc into last space - continue decreasing 1 st per row until 8 sts remain. 

Cont. straight for further 29 rows, stitch pattern per row of ch 2, tr into first space, tr 5, dc 1.

Next row, ch 2, tr into first space, tr 6, then dc into last space (so 1 x tr and 1 x dc in same space).  You should now have 9 sts.  Cont. this stitch pattern, increasing 1 st per row, until 31 sts.
 
Final row as above (making 32 sts in all),  but keep a loose tension, or your work won't stretch wide enough to join to side of bag.

It's the ch 2/dc 1 at the start/end of each row gives the handle its curved shape.

© Hooker Chick

With darning needle, join edge of handle to side of bag matching up the 32 sts with corresponding spaces ...

© Hooker Chick

© Hooker Chick

For the finishing touch, hook a row of trebles in sets of 3 into the spaces along the top line of the bag and handle seams.  Voila!

© Hooker Chick


© Hooker Chick


© Hooker Chick

So there you go ~ a really useful bag that you could put all sorts of stuff in.  Of course now that mine is full of yarn, it's unlikely to be used for anything else!


Wednesday, 18 February 2015

Have hook, will crochet.

I don't recall at what age I first picked up a crochet hook, but I do remember making my very first chain stitch ... and the next, and the next ... and eventually ending up with an enormous ball of chain stitch made from various scrap bits of yarn along with the notion of entering the Guinness Book of Records for the longest crochet chain ever made.  I also remember making a granny square waistcoat ~ I must have been twelve/thirteen at the time ~ but then schoolwork and exams and the rigours of being a teenager left no time for hobbies.

It wasn't until my early 20's that I picked up a hook again.  I was living on the Oxford Canal at the time, and spent many a happy hour sitting on the roof of my boat with lovely friends, chatting, crocheting blankets, porthole doilies and cabin lace, and drinking tea.

In my late 20's I moved off the canal onto dry land.  I didn't pick up my hooks again for years, and it's only in the last couple (I'm now in my mid 40's) that I started hooking again in earnest.  Now ... I'm not saying that I'm a crochet expert, far from it in fact ~ there are many, many stitches that I've not even attempted yet.  All I know is that I need to crochet.  It calms my overthinking brain.  It "burns off the crazy".  And it's less fattening than binging on cake. 

So my plan for this little blog, as I expand my crocheting skills, is to fill it up with various original creations and projects and useful stuff and info.  That's if I'm not too busy hooking to post.

© Hooker Chick